Bookmark and Share
Showing posts with label Bands. Show all posts

Saturday, 26 March 2011

The Flesh Eating Foundation @ DV8 Festival, York 2010
(c) Imago Mortis Photography


Photographing festivals


There are two types of festival: Indoor and Outdoor, and each have their own rules. We give you a few tips on how to get access to them and get great results.

Festivals can be small scale affairs or major events. By the time you’ve shot a few good sized club gigs the chances are you’ll have a portfolio showing the best of your abilities. At this point you may want to contact small print or web publications about providing them with photos for gigs. This will give you the ability to contact band’s, promoters and organisers about getting press passes for larger events.

Shooting at this level has a few more rules to learn. An amateur to intermediate photographer wouldn’t have problem getting access to an event providing they have a publication to confirm they will be receiving the pictures, but they may have equipment limitations. Large festivals for example will require a more powerful lens due to the sizes of the stage. For smaller festivals though it won’t be so much of a problem, so a cheap telephoto lens or the top end of the standard lenses should do the job.

Natural light brings it’s own problems and eases too. There is less adjusting of the camera’s settings to do before hand for one. The abundance of sunlight will give an even spread of light that will allow you to focus on your angles, depth of field, and generally spend more time on looking out for the shots to get. However there can be an excess of UV lighting that will bleach colours - this can be easily compensated for buy buying a £10 UV filter. Glare caused by multiple light sources and excess light can also ruin photos, but again a £5 camera hood will cut this out.

At an indoor festival you will probably have the benefit of a press pit to free you up from the jostle of the crowd, but you must still pay attention to dark and complex lighting conditions and any rules regarding shooting times. In both the indoor and outdoor situations you’ll want to be ready to go without having to adjust throughout songs. The basic set up for your camera should be: ‘Manual’, ISO 400-800, Aperture F/4-6, and a shutter speed of 10th-30th of a second. These will give you a broadly quick starting point to get as many shots as you can.

Get as many shots of one pose as you can, use different angles and crouch if need be. Use different focal lengths, get different band members. Get a good spread of photographs and when the set is over go through them and delete the outright bad ones before the next set. You’ll be glad of this when it comes to post processing.

Luxury Stranger @ DV8 Festival, York 2010
(c) Imago Mortis Photography

Hints & Tips:
Get permission!
Some venues have a zero tolerance policy on cameras which may result in ejection from the premises so it’s best to contact the venue owner or the band first preferably by email so you can print a copy to take with you. Bigger venues, festivals, and band’s tour managers will issue press and photo passes to journalists so get in contact with a publication or website about contributing photos and the editor will more often than not sort you out with a pass.


The ‘rule of three’
At some gigs, and most definitely at festivals there is something called the rule of three to watch out for. This basically means you can only shoot the band for the first three songs. Some promoters and venues are more relaxed about this depending on the band. If you attend a concert as an unofficial photographer it doesn’t mean much to you, but it is in place so that photographers don’t get in the way of the audience. As this is the case you’ll want to focus on getting shots of the band at the climactic points of the first three songs which will sometimes require research. Needless to say having your camera ready to go is a must in this situation.


Post-processing
Chances are if you shoot four bands you’ll have deleted a hundred odd photos in total at the gig and still have a full memory card. The worst bit is you need to pick 15-30 to polish. This takes the most time and effort, and it will ultimately determine the look of your portfolio.
A standard way of going through your photos is to transfer the photos you’re considering editing to a separate folder. Only you can determine what you think is a great shot in this environment as all tastes are different. Motion may appeal to you, or you may be a stickler for clarity. In the end it’s your style. Once you’ve picked a few dozen photos, go back through them with a critical eye and any photos that look too similar or have noticeable imperfections should be binned.

If you’re not a fan of complex lighting there are two ways to enhance your photos, and they compliment each other in a portfolio. If you want to keep some of the colour, but not as strongly, simply de-saturate the colours by a few points and then adjust the brightness, midtone and shadow until you’re satisfied. The other option is to convert the picture to black and white and adjust the brightness, midtone, and shadow as well. These will give you sharp and atmospheric looking photos.

If the problem is a matter of noise on the photo, there are several filters built into photoshop and paint shop pro that will help. ‘De-noise’ and ‘Remove noise’ will take away some of the problem, but tools such as ‘Gausin Blur’, ‘Bightness and Contrast’, ‘Clarify’ and photograph restoration features on both programmes can be adjusted to remove major areas of noise.

The final thing to remember is to make high resolution copies of your files for print, in case you want to submit them to magazines or to create a physical portfolio or even to sell as prints through outlets such as Deviant Art. This can be done by simply resizing the image to 300 dots per inch in the image-resize option. However, if you are also making low resolution copies for an electronic gallery/portfolio, remember to add a watermark (if you want) and save the file at 72 dots per inch for a faster loading speed.
 
Wayne Hussey @ DV8 Festival, York 2010
(c) Imago Mortis Photography

Saturday, 19 March 2011

Decadenze @ The Duke Of Wellington Pub, Lincoln 2009
(c) Imago Mortis Photography
 

Concert photography isn’t the exclusive realm of professionals with extensive magazine contacts. Anyone, with any level of DSLR can get fantastic shots of a band whether it is at an outdoor festival, your local pub, or an arena. We show you how to get stunning results and how to overcome low-light and movement issues.


Photographing the local pub circuit

Everyone who is shooting for magazines, and websites started in the same place. The local pub. The local live circuit is an invaluable place to gain experience and network with bands. Just because a band is playing small venues doesn’t mean they aren’t showmen, and never underestimate the quality of light at pubs that advertise regular gigs. The big advantage to starting out taking photos down your local is the relaxed atmosphere. Exchanging your photos with bands for a credit and link back on their website will mean more invitations to gigs and even being invited to do promo photos. And by the end of this Beginner’s Guide you’ll know all the tricks to get great quality photos that will standout and open doors for you.

There are no set rules to concert photography, so experimentation is the name of the game. For instance, some people like to get a crisp shot, others like over saturated light and some prefer motion blur and light trails. Atmosphere is king as it is about documentation rather than promotional portraiture. This means that you are free to use whatever tools are at your disposal: entry level cameras such as the Sony Alpha 200 with the standard lens can produce the same level of quality as the top-spec counterpart as long as you know your way around the settings.

A good sized memory card (2gb and over) is sufficient for a four band line up, and with an average set lasting about 30-40 minutes there is plenty of opportunity to take a few test shots, adjust the ISO and aperture settings, and see what works for the band. What is a must though, is to set your camera to continuous shooting. This will allow the camera to work at it’s maximum speed to increase the chance of getting that perfect shot.
Exposure times will add the atmosphere to a shot. A shorter exposure will mean crisper foreground colours and a darker background. This works particularly well in intimate gigs to ‘hide’ the size of the venue. A longer exposure will allow more light into the camera at the expense of sharpness leading to movement blur and light streaks. These can be used to great effect but it reduces your chances of getting a clear shot. A wider aperture setting with a shallower depth of field however can compensate for this as it will blur the background and make batter use of the available light, thus increasing your shutter speed.

The flash, whether it is your camera’s internal flash or a flashgun with a diffuser fitted will not be needed in any concert situations. The flash will only serve to over illuminate the subjects, eliminating the natural ambiance and bleach the skin tones. The internal flash will also decrease the shutter speed and over expose your shots. There are other reasons for not using the flash but we’ll come to those in the next section.


Eibon La Furies @ The Duke Of Wellington Pub, Lincoln 2009
(c) Imago Mortis Photography

Settings for your camera

1) MODE You can set your DSLR camera to ‘Action’ mode - this will automatically set the camera up to capture fast movements. This on it’s own may be sufficient for acoustic gigs or small gigs in pub beer gardens or local playing fields, however some small adjustments may also have to be made to get the correct exposure. But for situations where natural light is plentiful, the beginner can get away with shooting in this mode with no fiddling. Otherwise set you camera to ‘Full Manual’ and adjust the spot metering, this will take the meter reading of a smaller area when shooting complex lighting situations.

2) EXPOSURE Set your exposure as low as you dare - a longer exposure will create vivid colours and streaks. If you like this then go for it. If not, you’ll want to make that shutter speed as fast as possible. This will create sharper images with darker backgrounds that will hide the size of your venue, and when shot from the right angles, capture a more dramatic shot of the subject.


3) ISO The rule of thumb is that the more ‘professional’ the camera, the higher you can crank up the ISO setting. Top of the range DSLRs will give you sharper images with less “noise” on them if you increase the ISO setting. On entry level DSLRs it is best to either stick to around the 400-800 ISO mark depending on the light quality, or leave the setting to automatic if you’re not sure. Again this is an area where trial and error is best - sacrificing a few early shots in the set to find the right setting will lead to more great photos overall.

4) APERTURE A wider aperture with a shallow depth of field will use all of the available light to the camera’s advantage, creating a sharper foreground capture while blurring a distracting background. A setting of around F/4-6 works best if using a standard lens. An expensive telephoto lens will allow you to move outside of this range but it isn’t necessary for this level of concert.

5) FORMAT Consider shooting in RAW format. This has advantages and disadvantages, RAW captures more information than JPG meaning that you have greater control over the editing of the image. However as the camera works harder to process the information your shutter speed decreases. Fine quality JPG is still OK and will let you shoot in faster bursts, but the compression noise on the final image coupled with ISO noise can sometimes ruin otherwise great captures.
 
 
Fall Of Industry @ The Duke Of Wellington Pub, Lincoln 2009
(c) Imago Mortis Photography


Part 2 Coming Soon...

Tuesday, 20 July 2010

What a weekend!

Congratulations to the organizers, artists, and performers who did an excellent job at DV8 Festival in York this past weekend. As you can guess I took a lot of photographs of the bands over the weekend and these will all appear in my portfolio over the next couple of weeks. There were so many standout bands it would be hard to choose which ones impressed me the most and I'd deffinately be up for seeing many of them again.

Worth special mentions were the Burlesque performers who put on some great and very funny shows over the course of the weekend, as well as the hostess with the mostess Rosie Lugosi.

Now I have to whittle around 3-4,000 photos down to 20 each for each band I saw...

*Phew!*

Wednesday, 23 June 2010

Well the first of 3 lots of photos for album artwork has been published. This is a band photo of the sublime Avant Garde Black Metalers Eibon La Furies in the album art for their debut on Code666 records 'The Blood of the Realm'. You can see the full selection of promo photos at http://www.flickr.com/photos/imagomortisuk/sets/72157623173732954/

It may yet change but it seems as though sleazy goth rockers Deadfilmstar and Satanic Industrialists Midnight Configuration will be using photos in the artwork for their forthcoming albums that I took of them at the Nightbreed Records gig back in March at the Elektrowerkz in Islington, London.

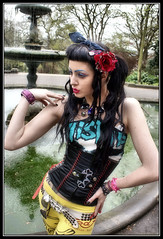
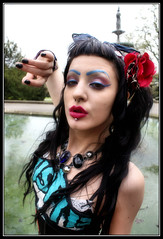
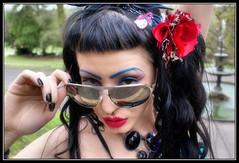
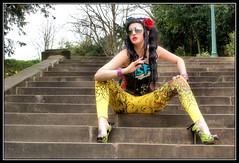
Now it's time to post the second half of the shoot with Miss Cobweb. Last week the photos were more glam/geisha inspired, but this week they're along a more 80s punk/hair metal theme:


Full set: http://www.flickr.com/photos/imagomortisuk/

A latex uniform shoot with Felix Liquer and a Fashion Shoot with Alivya V Free will be posted shortly.

Imago Alchemae: Imago Mortis on Tumblr

 
Twitter Facebook Tumblr Flickr Red Bubble