

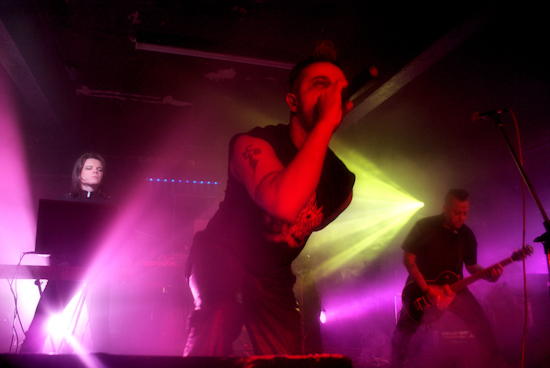
Screaming Banshee Aircrew @ The Duchess, York 2010
(c) Imago Mortis Photography
Photographing touring bands
Shooting in your local is one thing but there are a few different rules and hazards to look out for at club venues. We tell you the ins and outs of club shooting etiquette.
You’ve maybe had a few good goes at shooting local bands which has made you some friends and contacts, and given you a nice start to your concert portfolio. The next step is getting bigger names in that portfolio. It’s all well and good having a great shot of a band nobody has heard of, but it’s even better if at least someone will recognize them. The fact is that most bands don’t play huge arenas, most play venues no bigger than a secondary school’s assembly hall. This means the door price is low (typically £5-25) and there is no set photographer pit. This has it’s advantages and disadvantages. It doesn’t mean it’s necessary that you have to wrangle your way onto the press list, but you will have to watch out for the crowd.
The crowd are there to have a good time and will typically be indifferent to the plight of the local photographer, so expect to be jostled and your movement to be impaired. Also, don’t expect people to let you get to the front, getting in their early is your best bet for a clear view of the stage and when the place fills up, to move about as best you can without annoying people. The other thing to look out for is security, some clubs don’t allow cameras, so be sure to email ahead of time to get permission (and take the email with you just in case) or else you may be ejected.
The lighting will typically be better quality in a club as well so you can expect more ambiance for your photographs, but also more movement and complex saturation. This can be extremely frustrating for the beginner as moving light will throw your camera out of focus, and over saturate pictures. The trick is to keep shooting. Most bands have a set ‘pose’ list meaning that if you miss a fantastic shot or it’s blurred or over saturated, don’t fret as the performers will usually do it at least once more before the end of the set. They want to look their best in your photos and will almost always play up to the presence of cameras.
One thing that many bands and promoters discourage is the use of flash, whether the built in or external variety. It’s already been mentioned how it may effect your photographs, but it may also effect your reputation. Strong flashes on small or busy stages will get in the eyes of performers - remember they only see a dimly lit crowd, not the full brightness of the stage, so bombarding them with flash is not going to help them visually perceive hazards.
Inertia @ The Electrowerkz, London 2010
(c) Imago Mortis Photography
Equipment for your camera 1) MEMORY CARD You’ll want a good size compact flash card, preferably 8gb and over plus one for backup. To get that one perfect shot you’ll shoot at least ten others that wont make the grade and when shooting in RAW those memory cards fill up quickly. Also remember to delete the outright bad shots between bands.
2) SPARE BATTERY DSLR batteries drain annoyingly quickly. Four bands doing a 30-45 minute set each will drain half of your battery’s life, so a day long festival will quite likely take the lot. Add shooting in RAW to that equation and you’ll soon realise that it is always best to keep a charged spare.
3) UV LENS FILTER Again it’s an optional extra but it can be useful for outdoor festivals in the summer if not in a tent or shooting a covered main stage. This will give you better colour correction when a strong sun would otherwise bleach out colours.
4) TELESCOPIC LENS This one is a very practical option as in festival situations the press pit can get quite far away from the performers. Even standing to the side of the stage in some indoor venues can put you further away from the action than you’d like so if you have the spare cash a good telescopic lens can work wonders and free up your aperture range as well.
5) SOFTWARE Unfortunately unless you own a top of the range camera ISO noise will be a problem. ISO noise occurs in dark patches on the photograph where the camera struggles to get more light. Shooting in RAW and editing in Photoshop, or now for those on a budget Paint Shop Pro X3, will enable you to edit out noise and also give greater control over colour and white balance.

Midnight Configuration @ The Electrowerkz, London 2010
(c) Imago Mortis Photography
Part 3 Coming Soon...
0 comments:
Post a Comment